
Last updated on April 16th, 2024 at 01:28 pm
Apple products are some of the best gadgets you’ll get to own. The most ardent tech enthusiasts will attest to that statement. Even casual tech lovers have been smitten by Steve Jobs’ brainchild.
If you are a self-confessed Apple groupie, you likely don’t mind retiring a piece of still perfectly functional gadget early, shelling out a considerable amount of money, if only to get your hands on the latest model of Apple’s sophisticated offers. That is despite how there are cheaper and smart ways to upgrade your MacBook or iPhone.
You’re probably even one of those people who would willingly line up for hours outside an Apple store so that you could be among the very first customers to check out the brand’s latest release. And there’s no shame in it.
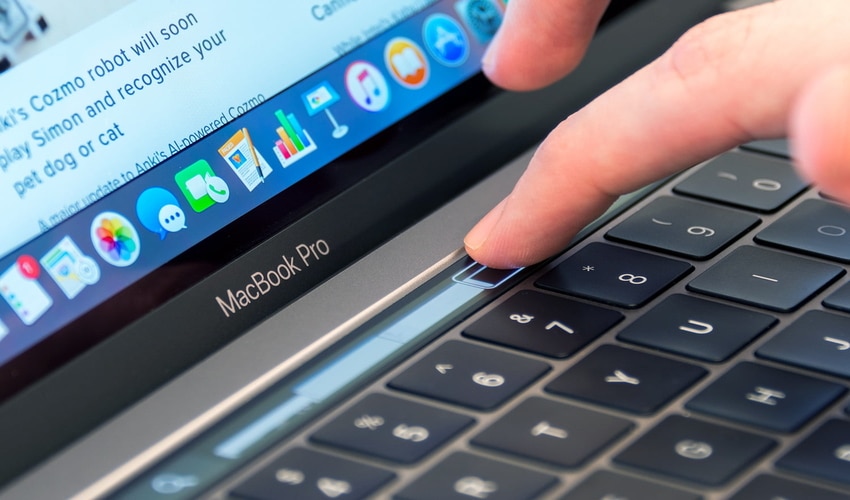
This level of love for Apple products is understandable. The brand always tries to outdo itself. In every iteration of their technology, they introduce something novel and groundbreaking. That could be something as simple but cutting-edge update as a touch bar on the MacBook.
Only 13- and 15-inch MacBook Pros are equipped with the Touch Bar on the keyboard’s topmost part. It replaced the keyboard’s function keys via a touch-based OLED bar. Here are practical tips for you to maximize the Touch Bar.
Look down from time to time
The average typing speed is 41 WPM. If yours is way above the average, chances are you seldom look at the keyboard when you type. However, to make the most of the Touch Bar, you need to look down from time to time.
The Touch Bar’s light-up panel adjusts to your activity. Based on what you’re doing on the MacBook screen, the Touch Bar personalizes the function keys to make your experience more seamless. You might find these suggestions helpful to whatever you’re working on.
Customize
The Touch Bar function keys change depending on the activity you’re doing. As for the default function keys that you see when you open your laptop, you can customize them. Here, the key is choosing the features you use most frequently.
Go to System Preferences. Select “Keyboard” and choose “Customize Control Strip.” From there, you can set your preferred default function keys on the Touch Bar.
Screenshot
If you’re a longtime MacBook user, you probably know that simultaneously clicking Command + Shift + 3 or 4 gets you a screenshot. What if you no longer have to press three keys at the same time? With the Touch Bar, that’s possible—you have a screenshot key on your keyboard.
Install third-party apps
You can further maximize Touch Bar features via downloadable apps. Here are some of the most noteworthy.
- Haptic Touch Bar – Some people appreciate the tactile sensation of pushing actual keys. That’s been made obsolete by the Touch Bar. This is where Haptic Touch Bar comes in. True to its name, this app gives haptic feedback every time a key on the Touch Bar is, well, touched.
- TouchSwitcher – This app shows the icons of active apps. That results in ease when switching between programs. This is most recommended to multitaskers. You no longer have to rely on Command-Tab keys or your mouse or touchpad, for that matter.
- BetterTouchTool – This elevates Touch Bar customization to another level. Add custom action buttons, or make apps that are not supported by the Touch Bar compatible with the program.
Accessibility features
Access this function by going to Systems Preferences, then select “Accessibility.” One of the most helpful features available is the VoiceOver command, which you can include on the Touch Bar. That’s handy for those indisposed to type.
Put the Touch Bar on “mute”
This is antithetical to what this post is supposed to accomplish, which is to help you maximize the Touch Bar. However, not everyone is a fan of this update. If you are not very keen on the Touch Bar and feel like you are stuck with it, you can have it on “mute.”
- Click on the Apple logo
- Go to System Preferences
- Click on the Keyboard function
- Click on the menu box next to Touch Bar
- From the dropdown menu, choose Function Keys
That will stop the Touch Bar from making recommendations based on your activities. The Function Keys will be its default panel.
Productivity in a Touch
In an ideal world, everyone could get their hands on an iPhone or MacBook. However, in reality, many people are strapped for cash and couldn’t afford these products—unless, of course, you join a reward program or do other clever shopping hacks.
Now, if you’re among the privileged for whom buying an Apple product won’t break the bank, ensure that you make the most of your gadget. For Touch Bar-equipped MacBooks, for example, learn as much about the technology as you can. You already have a good start with the tips on this list. By all means, please discover more.